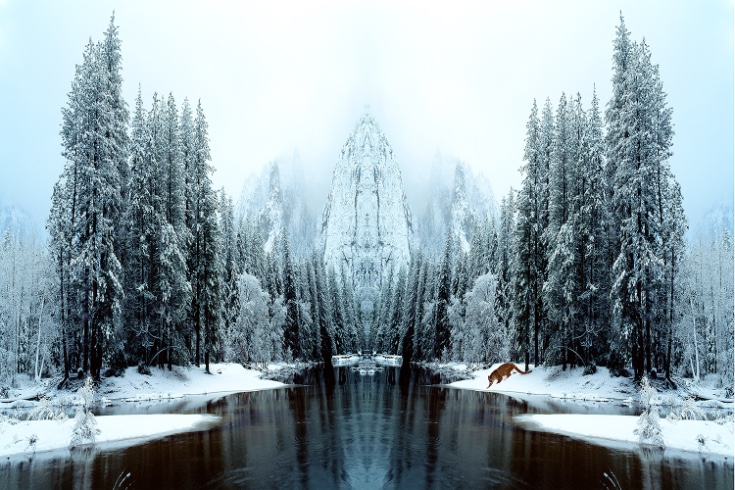
Making a mirror image in Photoshop is a unique and visually arresting technique. But when you add an element that isn't mirrored at all, it makes a viewer pay attention. This is a winter landscape shot in Yosemite National Park, and after I mirrored it I added the mountain lion only on the right side. The cat was originally photographed in the snow, so it was easy to separate him from its background and insert into this picture. The basic mirror technique is: Select > all, then Edit > copy. Next, use Image > canvas size. Double the width of the image in the dialog box, hit OK, and then go to Edit > paste which puts the clipboard image into the background. Then use Edit > transform > flip horizontal, and with the move tool, move the image in place. I explain this in more detail in my upcoming eBook titled Cool Photoshop Techniques.

4 Comments
Dec 28, 2015, 9:56:33 AM
Stan Greenberg - Jim:
Please let me know when your eBook, Cool Photoshop Techniques becomes available.
Happy New Year.
Stan
Dec 28, 2015, 9:30:02 AM
Jim - Hi Stan, Thanks, I will. It will have 20 chapters and I'm writing 13 right now. I plan on it being available the middle of January. I'll announce it in this blog.
Jim
Dec 24, 2015, 8:16:46 AM
Jim - Hi Tom, I appreciate your critical comment on this. I thought about adding a reflection of the mountain lion, but given this angle and the fact that the cat is a few feet back from the edge of the snow, I wondered if I would have seen a reflection. I will add one and see if it looks correct. Thanks again for your perceptive analysis. Jim
Dec 24, 2015, 7:34:12 AM
Tom Rhyne - Need a reflection of the mountain lion in the water to complete the picture...